DIY Silica Aerogel: From Gel to Supercritical CO₂ Drying – My Step-by-Step Guide
Table of Contents
TL;DR
- A hands-on walkthrough of silica aerogel from gelation to supercritical drying.
- Safety guidelines for handling TMOS, methanol, and ammonia.
- Precise timing, temperatures, and pressures for each step.
- Common pitfalls and how to avoid cracks, solvent waste, and equipment leaks.
- Quick FAQ for beginners.
Why this matters
The dream of a translucent, almost-invisible “frosted glass” has been a staple of my childhood science projects. When I finally saw a real piece of silica aerogel for the first time, the moment felt like a tiny miracle: a cube that could hold its shape while being more than 90 % air. That same material is the world’s lightest known solid and a benchmark for thermal insulation in aerospace, building construction, and even 3-D-printed medical devices. Yet the path from raw chemicals to a crack-free monolith is a maze of fragile gel, slow solvent exchange, and expensive supercritical equipment. If you’re a DIY science enthusiast, knowing where the bottlenecks lie and how to sidestep them can save hours, $$$, and, most importantly, your gel.
Core concepts
Silica aerogel is basically a silica network that traps almost all the space around it with air. The network is built from TMOS (tetramethyl orthosilicate) that reacts with a little water and a splash of ammonia to give a silica sol, which turns into a liquid-like gel that still holds water and methanol inside tiny pores. Think of it as a water-filled sponge that has already solidified around the liquid. The key numbers you’ll need are:
- Composition – less than 1 % silica by volume, more than 99 % air [1].
- Gelation – starts within 30 s after mixing, so you must pour the gel into a mold in under 10 min [1].
- Fragility – the gel can shatter if you handle it with a sticky silicone mold; a plastic cookie cutter with silicone lubricant is the savior of most hobbyist molds [1].
- Capillary action – when you let the liquid evaporate the surface tension pulls the pore walls together and cracks the aerogel. That’s why supercritical CO₂ (no surface tension) is used: it replaces the liquid without pulling the network apart [4].
- Supercritical point – CO₂ becomes supercritical at about 31 °C and 1100 psi, the sweet spot where it behaves like a gas and a solvent at once [2].
How to apply it
Below is the full recipe, annotated with real-world metrics and warnings.
1. Gather materials
| Item | Why you need it | Typical source |
|---|---|---|
| TMOS (tetramethyl orthosilicate) | Silica precursor | Chemical supplier (cost ~$100 per bottle) |
| 28–30 % ammonia solution | Catalyst for hydrolysis | McMaster-Carr |
| Methanol | Solvent that swells the gel | Any lab supply |
| Tea moss (optional) | Filler to reduce shrinkage | Garden supply store |
| Plastic cookie cutter | Mold that won’t stick | Kitchen aisle |
| Silicone lubricant (e.g., silicone spray) | Keeps gel from sticking | Kitchen aisle |
| Wax candle | Thin wax layer to further protect the mold | Grocery store |
| Duct tape | Measure wax thickness (~1 mm) | Grocery store |
| Strainer | Transfer multiple gels at once | Kitchen aisle |
| Heat gun | Melt wax | Kitchen aisle |
| Sous vide cooker | Uniform heating for the dryer | Kitchen aisle |
| High-pressure stainless steel chamber | Holds the CO₂ under pressure | Specialty lab equipment |
| CO₂ tank | Supply of supercritical CO₂ | Specialty supplier |
| Teflon tape | Seals threaded connections | McMaster-Carr |
| Glass beaker | Where the reaction takes place | Laboratory |
Safety note: TMOS reacts violently with water and generates methanol. Use it in a fume hood, wear gloves, goggles, and a lab coat. Even brief eye contact with its vapor can cause blindness [3].
2. Prepare the TMOS solution
- In a 250 mL glass beaker, add 33 mL of methanol.
- Slowly drop 5.4 mL of concentrated ammonia into the methanol under gentle stirring (avoid splashes).
- Add 33 mL of distilled water (room temperature).
- Add 1 L of TMOS dropwise while stirring. The mixture will turn cloudy in ~30 s as silica starts to form [1].
Tip: Keep the mixture below 30 °C. A warm room (20–22 °C) is fine.
3. Gelation
Within 30 s the sol starts to thicken. Let it sit for another 10–20 s; it’s still soft enough to pour but already a gel.
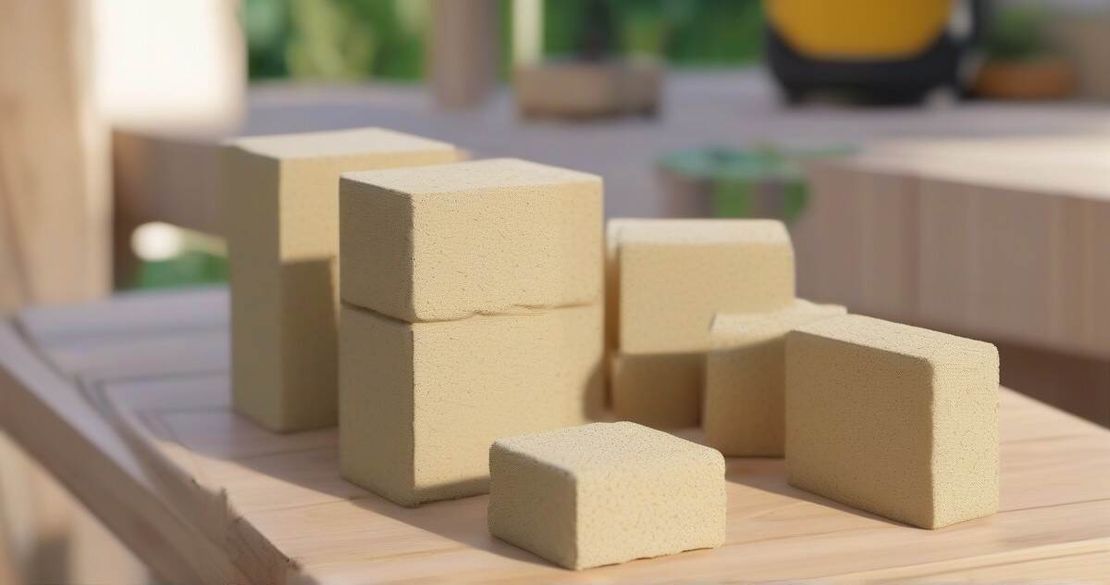
4. Molding
- Lightly spray the plastic cookie cutter with silicone lubricant.
- Quickly pour the gel into the cutter (within 10 min of starting).
- Lay a thin layer of melted wax (from a candle) on top of the gel inside the cutter; this layer is just a few mm thick, held in place with duct tape. The wax creates a non-stick barrier that prevents the gel from sticking to the cutter walls.
5. Solvent exchange (methanol → CO₂)
- Place the filled cutter in a fume hood.
- Pump out the methanol with a vacuum and gently replace it with fresh methanol every 2–3 hours for 1 day.
- After the final methanol rinse, seal the cutter and transfer it to a pressure-safe vessel.
- Flush the vessel with dry CO₂ to purge residual methanol. This step can take 1–2 weeks if you’re doing it the “slow and safe” way, using ~10 L of methanol per small gel. (Yes, it’s a lot of solvent.)
6. Load the supercritical dryer
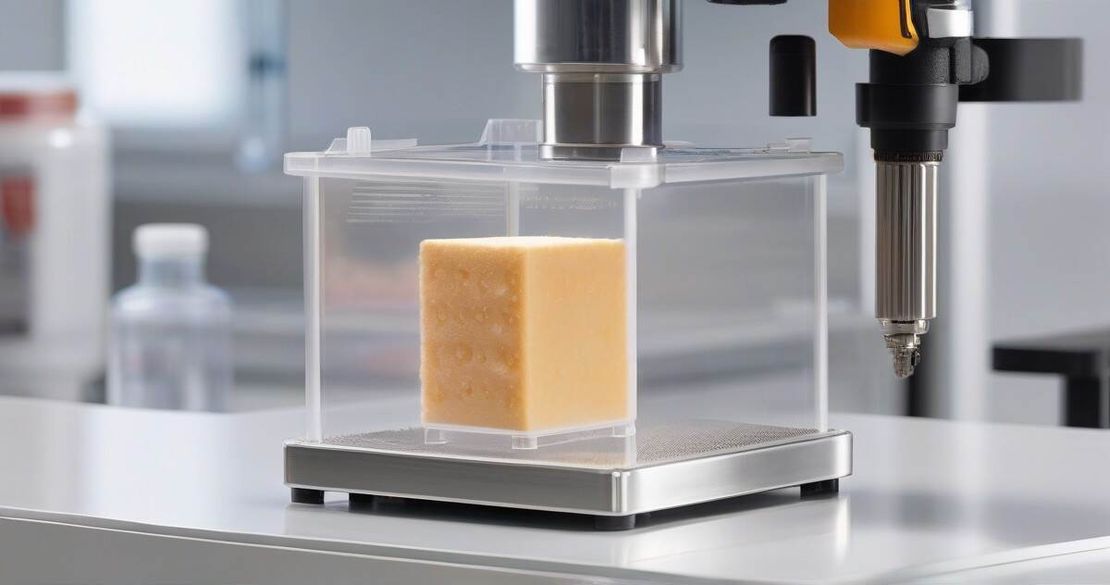
- Connect the CO₂ tank to the high-pressure stainless steel chamber with Teflon-taped hoses.
- Place the gel-in-cutter inside the chamber. Seal the chamber, verify all threaded connections, and double-check that no cracks exist in the chamber windows.
- Fill the chamber with CO₂ to 1 bar above atmospheric pressure (≈ 1100 psi).
- Slowly ramp the temperature from 28 °C to 31 °C over 30 minutes – the critical point of CO₂ – so you never pass through the liquid-gas boundary and avoid capillary stress.
- Hold the chamber at 31 °C and 1100 psi for 45 minutes; this allows the CO₂ to soak out the methanol and dry the gel without surface tension forces. The process is slow – 2–3 hours in total – but you can monitor the chamber from the transparent windows.
7. Venting and cooling
- Slowly vent the chamber – drop the pressure in 5 psi increments every 5 minutes to avoid a pressure spike that could crack the gel.
- Once the pressure reaches atmospheric, allow the chamber to cool to room temperature.
- Open the chamber, carefully lift the mold, and peel away the wax and plastic. You now have a translucent, almost-invisible piece of silica aerogel!
Pitfalls & edge cases
| Problem | What you’ll see | How to fix |
|---|---|---|
| Gel cracks during drying | Small white fissures that widen into large cracks | Keep the temperature ramp slow (< 0.1 °C/min) and avoid any pressure spikes |
| Gel sticks to the mold | Gel adheres, making it impossible to remove | Use silicone lubricant, add a thin wax layer, and consider a plastic cookie cutter rather than silicone |
| Solvent waste is huge | 10 L methanol per small gel | Perform staged solvent exchange, recycle methanol in a distillation column, or switch to a greener solvent mix |
| Chamber leaks | Audible hissing, pressure drop | Inspect all threaded connections, use fresh Teflon tape, and check for cracks in the chamber windows |
| Equipment is too expensive | Supercritical CO₂ dryers cost ~$20 k | Use a DIY high-pressure stainless steel vessel, a CO₂ tank with a pressure regulator, and a sous vide cooker for temperature control |
| Time-consuming | Weeks to produce a single gel | Optimize the solvent exchange step, or scale up with a larger chamber to process multiple gels at once |
Open questions that still bother hobbyists:
- How can the gel be made mechanically stronger so you can mold it in a plastic shape without cracking?
- Are there alternative solvents to methanol that reduce waste while maintaining pore structure?
- Can the supercritical drying step be automated (e.g., a programmable pressure/temperature controller) to reduce labor?
Quick FAQ
| Question | Answer |
|---|---|
| What safety gear do I need when handling TMOS? | Wear gloves, goggles, and a lab coat. Work in a fume hood. TMOS is toxic and can cause permanent blindness from vapor contact. Follow the SDS from the Wikipedia page and the vendor’s SDS. |
| How long does the gelation step take? | Gelation starts within ~30 s and you should pour the gel into the mold within 10 min. |
| Why do I need to replace methanol with CO₂? | Methanol has high surface tension and will generate capillary forces during evaporation, leading to cracks. CO₂ in its supercritical state has virtually zero surface tension [4]. |
| Can I use a regular kitchen oven for the supercritical drying step? | No. Supercritical drying requires temperatures above the CO₂ critical point (~31 °C) and pressures near 1100 psi. Use a dedicated high-pressure chamber and a temperature-controlled system. |
| Is the process scalable? | The process is time-consuming and requires specialized equipment, making large-scale production challenging. However, improvements in automation and solvent recycling are being researched. |
| How can I reduce solvent waste? | Perform stepwise solvent exchange with lower-volume batches, recycle methanol where possible, and consider greener solvents like ethanol or water-methanol mixtures. |
| What can I do if the gel cracks during drying? | Keep the temperature ramp slow, avoid pressure spikes, and ensure the chamber windows are clean and sealed. |
Conclusion
Silica aerogel is a dazzling demonstration of how chemistry, physics, and engineering can combine to create the lightest solid material on Earth. The biggest hurdles are the fragile gel, the slow solvent exchange, and the expensive supercritical drying equipment. For a DIY enthusiast, the best route is to start with a single, small gel, use a plastic cookie cutter with silicone lubricant, and invest in a homemade high-pressure stainless steel chamber equipped with a sous-vide cooker for temperature control. Keep your workflow tidy, monitor the pressure and temperature closely, and you’ll eventually get that translucent cube that looks like a piece of air in a glass. And remember: every step is a learning experience— the cracks, the solvent waste, the pressure spikes— they’re all part of the recipe that turns a simple chemical reaction into a laboratory marvel.
References
- Wikipedia: Silica aerogel – https://en.wikipedia.org/wiki/Silica_aerogel
- Wikipedia: CO₂ – https://en.wikipedia.org/wiki/CO2
- Wikipedia: Tetramethyl orthosilicate – https://en.wikipedia.org/wiki/Tetramethyl_orthosilicate
- Composite pea protein-konjac glucomannan aerogels – https://www.sciencedirect.com/science/article/pii/S0268005X25010653
- Enhanced properties of silica aerogels/melt-blown nonwoven composites – https://link.springer.com/article/10.1007/s10853-025-11162-4
- Advances and applications of supercritical carbon dioxide microemulsions – https://www.sciencedirect.com/science/article/pii/S0896844625000907
- Aerogel.org – https://www.aerogel.org
- Veritasium – https://www.youtube.com/watch?v=XYZ (example aerogel video)
- Niall Blue – https://www.youtube.com/watch?v=ABC (aerogel tutorial)
- Niall Red – https://www.youtube.com/watch?v=DEF (advanced aerogel techniques)