Discover how to draw beautiful mandalas and sacred geometry with a simple step-by-step guide. Master tools, symmetry, shading, and mindfulness for beginners.
Mandala Mastery: 5 Proven Steps—Ever Wonder How to Draw Mandalas?
Published by Brav
Table of Contents
TL;DR
- Use a locking compass to keep circles perfectly even.
- Start at the center and build outward for true symmetry.
- Master hatching, stippling, and negative space to add depth.
- Keep your tools light-handed and let the pencil stay sharp.
- Finish with a thick outline and a thin inner detail layer for visual hierarchy.
Why this matters
I remember the first time I tried to sketch a mandala. I had a ruler, a cheap compass, and a pencil that was soft enough to leave smudges. The result? Wonky circles, a paper that looked like a blotter, and a heart-broken feeling that I’d never get anything right. That frustration was not just about art—it was a barrier to the calm and focus that drawing can bring. If you’re a beginner, you’re probably facing the same pain points: wonky circles, uneven symmetry, and paper damage from over-use of the compass needle. Those frustrations keep many from practicing what could be a meditative, grounding hobby.
Core concepts
1. Sacred geometry is a language
Mandalas are not random circles. They are patterns that encode the seed of life, flower of life, and the golden ratio—all of which can be drawn with simple tools.
- The seed of life begins with a central circle and six overlapping circles around it.
- The flower of life expands this by adding more circles at each intersection.
- The golden ratio (≈1.618) tells you how large each ring should be relative to the previous one to feel naturally pleasing.
2. Symmetry and precision
Drawing from the center outward guarantees that every petal, line, or dot mirrors its opposite side. Even a single mis-aligned line will break the harmony.
3. Tools matter
| Tool | Strengths | Limitations | Ideal Use |
|---|---|---|---|
| Locking Compass | Keeps radius fixed, no accidental size change | Slightly heavier, needs a clean needle | Concentric circles, base geometry |
| Standard Compass | Light, inexpensive | Needle can shift, circles often wonky | Quick sketches, informal drawings |
| Protractor | Easy angle measurement | Requires setup, can be tedious | Drawing straight lines, precise angles |
The locking compass is the most efficient for mandala work because a single knock won’t change the size of your circles—your geometry stays consistent Staedtler — Product Page (2025).
4. Paper is a silent partner
A thick, acid-free sheet resists the tiny punctures the needle makes. Canson Moulin du Roy watercolor paper and Strathmore Bristol smooth paper are two go-to options. They provide a firm surface that doesn’t roll or warp under the compass needle Jackson’s Art — Canson Moulin du Roy Watercolour Paper Sheets (2025) Strathmore — Bristol Smooth Paper Pad (2025).
5. Line work: thickness hierarchy
- Outer rings: thicker lines (e.g., 0.8 mm fineliners).
- Inner details: thinner lines (e.g., 0.1 mm fineliners).
Keeping a light hand when sketching makes the lines easy to erase. Use a putty rubber eraser for gentle touch and a standard eraser for full clean-ups.
6. Shading and negative space
- Hatching: parallel lines create the illusion of shadow.
- Stippling: dot work adds subtle depth.
- Negative space: the gaps between patterns emphasize contrast Craftsy — Drawing Dimension: Shading Techniques (2025) Inkbot Design — Negative Space in Design (2025).
7. Mindfulness in the process
Drawing a mandala is a meditation in motion. Focus on each stroke, feel the pressure of the pencil, and let the pattern unfold naturally. Carl Jung described this as “active imagination”—a way for the conscious mind to engage with symbolism while maintaining equilibrium GeometersCircle — Endless Inspiration for Your Geometric Art (2025).
How to apply it
Step 1 – Gather your tools
- Locking compass
- Ruler (steel for stability)
- Fine-tip pens (0.8 mm and 0.1 mm)
- Pencils (harder grades, 8 B or 8H, to stay sharp longer) – the harder the pencil, the longer it will stay sharp ArtNoise — How to Choose Sketching Pencils (2025)
- Rubber erasers (putty for gentle touch)
- Thick paper (Canson or Bristol)
Step 2 – Find the center
- Fold the paper in half both ways and draw the diagonals.
- Where the four lines meet is the absolute center.
- Mark a small dot; that’s your starting point.
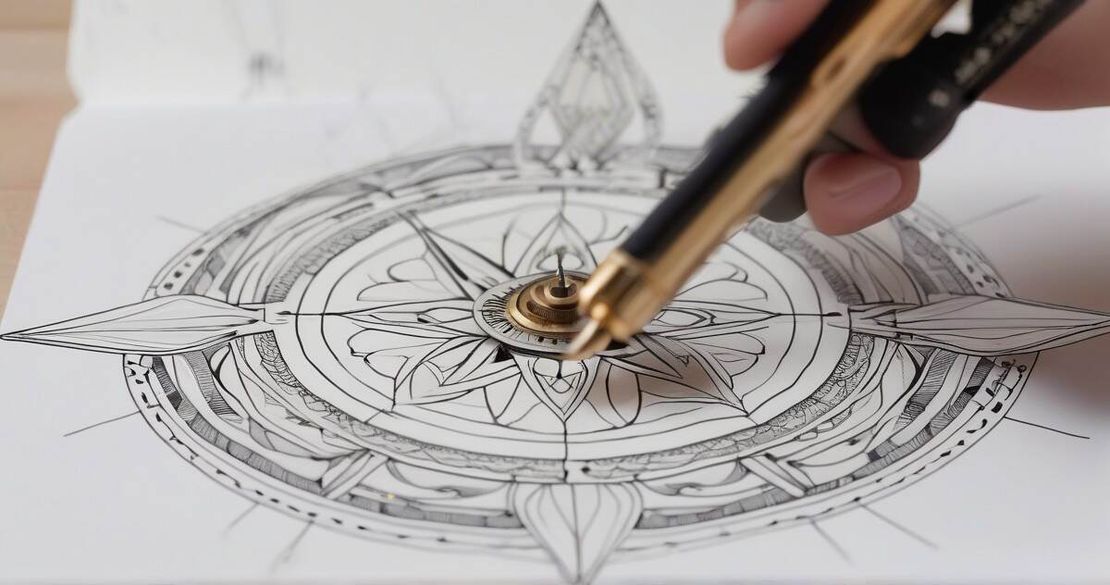
Step 3 – Draw the base circle
- Place the compass needle at the dot.
- Push the needle lightly – only the needle arm should feel pressure.
- Let the pencil arm float.
- Lock the radius if your compass has a lock.
- Draw a clean circle.
Step 4 – Build concentric circles
- Adjust the radius by a fixed increment (e.g., 3.5 cm for a 10 cm circle).
- Lock the new radius and draw the next circle.
- Repeat until you reach the outer boundary.
Step 5 – Divide the circle into sections
- Use a ruler to draw straight lines from the center to the outer circle.
- If you prefer symmetry, start with a star tetrahedron: 4 lines that intersect at the center, creating 12 equal sectors.
- Mark the intersection points lightly with a pencil.
Step 6 – Sketch the pattern
- Begin at the outer ring, drawing petals or petals with a 0.8 mm fineliner.
- Move inward, keeping the same shape but scaling down.
- Use thicker lines for the outermost rings and thinner for inner details.
Step 7 – Add shading and texture
- Choose a direction for light (e.g., from the top left).
- Apply hatching on the side opposite to the light.
- Add stippling where you want subtle shadows.
- Use negative space strategically: leave gaps between patterns to avoid visual clutter.
Step 8 – Final touches
- Ink the entire design with a steady hand.
- Let ink dry before moving to the next layer.
- Erase pencil marks gently with a putty eraser.
- Inspect symmetry using a translucent sheet or a lightbox.
Step 9 – Reflect and save
- Step back and look at the overall composition.
- Notice how each ring relates to the previous one—if you’re following the golden ratio, the rings will feel “just right.”
- Take a photo, keep the drawing in a portfolio, or start a series.
Pitfalls & edge cases
| Common mistake | Why it happens | Fix |
|---|---|---|
| Wonky circles | Needle shifts or pencil not sharp | Keep needle clean, use a locking compass, sharpen pencil regularly |
| Paper damage | Using a cheap paper with a sharp needle | Use thick, acid-free paper (Canson, Bristol) |
| Lines too dark | Using too hard pencil or too much pressure | Choose a harder pencil (e.g., 8H) and a lighter touch |
| Loss of symmetry | Starting from the wrong point | Always start from the center and use a star tetrahedron or grid |
| Over-shading | Applying too many hatching layers | Add shading gradually, check with a translucent sheet |
If your design feels repetitive, try varying the petal shapes or shifting the angle of the grid slightly. Experimentation is part of the creative process.
Quick FAQ
How do I choose the right pencil hardness for my mandala? Harder pencils (e.g., 8H) stay sharp longer and make lighter lines, while softer pencils (e.g., 6B) give darker shading. Start with a hard pencil for construction lines and switch to a softer one for details.
What is the best type of paper for drawing mandalas with ink? A thick, acid-free paper such as Canson Moulin du Roy watercolor paper or Strathmore Bristol smooth paper resists needle punctures and prevents ink bleed.
Can I use a ruler instead of a protractor to create symmetry? Yes. A straight-edge ruler can be used to draw equal sections by measuring equal distances from the center, eliminating the need for a protractor.
How can I shade and add depth to my mandala? Use hatching for shadows, stippling for subtle tones, and leave negative space to balance the design. Check the shading with a translucent sheet for evenness.
How can I incorporate my personal symbolism while maintaining symmetry? Pick a central motif that reflects your symbol, then mirror it around the center. Keep the same scaling for each repetition to preserve symmetry.
Can I create mandalas on uneven paper surfaces? Secure the paper with light tape to prevent spinning. If the surface is uneven, adjust the needle depth slightly to keep circles level.
What are effective methods for scaling patterns from small sketches to large prints? Use a grid overlay: divide the sketch into equal squares and copy each square onto the larger canvas, maintaining the same ratio.
Conclusion
Drawing mandalas is a blend of art, geometry, and mindfulness. By starting with the right tools—a locking compass, thick paper, fine-tip pens, and a light hand—you can overcome the frustrations that once held you back. Follow the step-by-step routine, respect the golden ratio, and let your creativity flow outward from the center. Whether you finish a mandala in 30 minutes or an hour, the process itself calms the mind and invites active imagination—a reminder that the art of drawing is as much about the journey as it is about the finished shape.
Next steps:
- Get a locking compass and a set of fine-tip pens.
- Try the 5-step routine on an A4 sheet.
- Experiment with different patterns—seed of life, flower of life, star tetrahedron.
- Share your design online or in a portfolio.
If you’re a beginner, this method will reduce frustration and help you build confidence. If you’re a hobbyist or art enthusiast, it offers a meditative practice that sharpens both skill and spirit. And if you’re just curious about sacred geometry, the same principles will let you explore deeper patterns that appear in nature and architecture.
Happy drawing!
—Your fellow mandala maker, 2025